How to start a honey bee farm? What setup is needed?
Beekeeping is the management and care of honey bee colonies. This practice has been on from the onset of human existence, although the methods keep on evolving. Nowadays, it has been made so easy by modern technology. Again, it is possible to raise bee colonies almost everywhere; in cities, villages, farms, etc.
People start beekeeping for various reasons. These include getting bee products, for pollination of crops, as a hobby, conserving these fantastic creatures, and learning their behavior. Whatever the reason, the practice is fun and rewarding. The bee products also possess diverse health benefits.
This venture requires knowledge, commitment, time, and year-round management. Although bees are independent creatures, they need a conducive environment for maximum productivity.
Similar Articles you may like to read –
is beekeeping profitable? How much can l make in a year?
How much does it cost to start beekeeping? How much do honey bees cost?
Basic Supplies For Beekeeping beginners | Beekeeping Equipment
How much do honey bees cost? Where can I get Honey bees? Things to consider
What You Need to Know and Do Before You Start Beekeeping
Learn About These Amazing Creatures
To succeed in this venture, you need to learn about honey bees and how to keep them. Some of the basic things to familiarize yourself with include honey bee biology and behavior, how to maintain a bee colony, the common problems affecting bees, tools and equipment that you need, and how to set up a hive. You can use online resources, books, videos, and learn from other beekeepers.
Know the Government Regulations in Your Area
There are some regulations that govern beekeeping in every state. Some rules may require you to register your hives, get a permit, acquire a license, etc. Other laws may include the number of hives you can put on your property, the location of the hive, and the like. This information will help you to avoid clashing with the law.
Bees Foraging Area
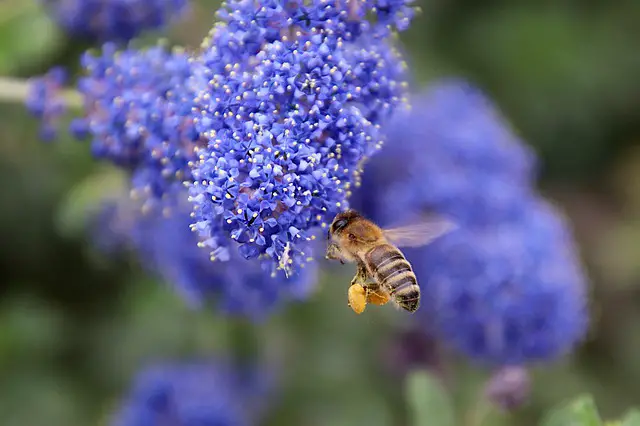
There must be a steady supply of nectar and pollen-rich plants in the surrounding (up to 3 miles). A lack of blooming plants can cause the colony to starve to death. Some of the major nectar sources include clover, lavender, sage, bee balm, corn flowers and buckwheat.
Know Your Level of Reaction to Bee Stings
You don’t want to put your life at risk in the name of a venture! See your doctor to carry an allergy blood test on you. A bee sting will only cause temporary pain and irritation for most people. It can trigger allergic reactions that range from mild to severe for a few others. In extreme cases, a bee sting can cause anaphylaxis, a life-threatening condition.
Consider Joining Your Beekeeping Community Association
This is one of the best resources you can tap from. Your local association has all the information you require to start. Again some details can be specific to your locality, such as state regulations, nectar flow, challenges of pests and diseases, and so on. You can consider walking with an expert before starting your bee farm. Most beekeepers are willing to answer your questions and guide you. Some local beekeeping clubs also have books and equipment that you can borrow.
Neighbor’s and Family Consent
This is a key consideration if you live in an urban setting and the neighbors are too close to you. It is good to know when your neighbors or family is allergic to bee stings. It will also be vital to take all the necessary precautions to minimize the interaction between bees and people. Consider fences and hedges.
How much space do you need to keep your bees?
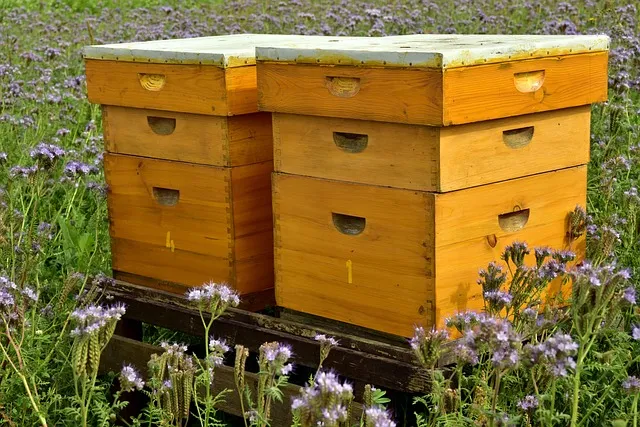
A typical Langstroth hive measures about 22 inches by 16 inches, so the physical space of a hive is not much. However, the bees will require a clear flight path. At any given time, hundreds of bees will be entering and exiting the hive and flying in different directions. They will require at least a 5 feet distance around the hive to fly comfortably. If you have more than one colony, they should be at least 3 feet apart.
The Ideal Time to Start Beekeeping
Honey bees depend entirely on the climate they dwell in. The climate governs their activities. Every season brings about new changes in the hive. For your colony to thrive, you need to start in early spring. The colony will have ample time to build up, raise brood, and build honey stores before winter sets in.
Time Commitment in Beekeeping
On top of the monetary resources, you will require time to set up the colonies, carry out inspections, keep the apiary in shape, and harvest the products. In some seasons, the bees will require more attention than others. Spring and summer seasons are more tedious for a beekeeper, while in winter, inspections are minimal. Most beekeepers carry out inspections once a week on their colonies and take 5 to 30 minutes on one colony. The time you spend depends on the number of colonies and the thoroughness of your inspection. You can spend 15-30 hours on one hive in your first year.
What is the start-up cost for beekeeping?
You will require some resources to get your colony up and running. These include bees, hives and frames, protective clothes, and essential tools. The initial cost will depend on the number of colonies, type and configuration of the hive, how you obtain the bees, and your goal. With a single hive, you will require approximately 500 -650 USD. This will vary with the choice of materials and equipment.
Essential Tools and Equipment
A Beehive(s)
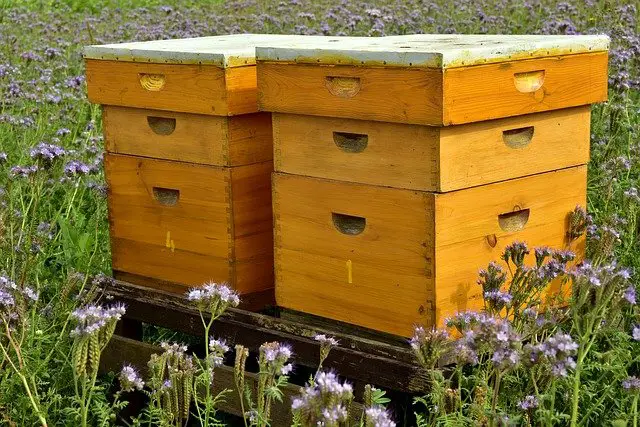
A beehive will make a home for the honey bees. There are various choices of beehives that you can choose from. The most common include a Langstroth, top bar, and Warre hives. The Langstroth hive is widely used in the USA and a perfect choice for beginners.
Parts of a Langstroth Hive
Outer Cover
It protects the hive parts from harsh weather conditions, just like the roof of a house.
Inner Cover
The inner cover is placed on the top of the top super and under the top cover. It provides an air space under the top cover for insulation.
Honey Super
The honey super holds the frames where bees store excess honey. This is what you harvest as a beekeeper.
Hive Body or Brood Chamber
A Hive body is a large wooden box that holds ten frames of comb and sits on top of the bottom board. This is where the bees raise broods and store honey for their use. You can use one or two boxes for the brood’s nest.
Hive Frames
Hive frames are wooden rectangles where bees build their comb structures. They are put on individual boxes (brood boxes and honey supers).
Bottom Board
It is a wooden stand on which the entire hive rests. It also includes an entrance where the bees come and go.
A Hive Stand
This is a structure that raises the hive off the ground to reduce the dampness in the nest.
Hive Tool
Bees tend to seal every part of the hive with propolis. A hive tool will help you to pry the seals open, detach combs from the hive, and pull out frames.
Smoker
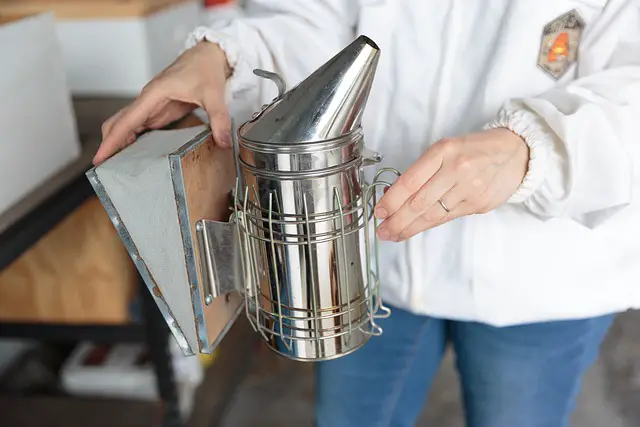
Smoke generated by the smoker helps to calm the bees while carrying out inspection or harvesting.
Bee brush

A bee brush consists of long, firm, non-stiff bristles that help to gently remove the bees from the surfaces that you don’t want them to be.
Honey Extractor
This is a mechanized device that will help you extract honey from honeycombs.
Queen Excluder
This is a metal rack with openings that are big enough for drones and workers to pass through but small for the queen. It helps the queen to remain in the brood chambers to avoid laying eggs in the honey supers.
Entrance Reducer
An entrance reducer is a notched wooden strip placed between the first deep super(brood Box) and the bottom board. It limits the access of bees to the hive.
Feeders
Feeders are used to hold supplement foods in the hive. Honey bees are usually fed when there are scarce food resources.
Protective Clothing that You Will Need in Beekeeping
Cap and Veil
These protect your face, neck, and head from being stung.
Beekeeping Suit
A suit is ideal for new beekeepers since it is a thorough way to protect against bee stings. It helps to cover most of your body to prevent the bees from gaining access.
Gloves
Gloves protect your hands from bee stings. Most beekeeping gloves are made from leather. They usually extend to your forearm to cover your sleeves well.
Boots
Although there are boots specifically designed for beekeeping, you can always go for what is available.
Setting up your hive, what do you consider?
A proper location for your colonies is essential for success. It is good to choose a good place from the word goes since shifting them will disrupt them. Here is what to consider:
Serenity
You should place your hive in a serene environment away from foot traffic, children’s playgrounds, etc. The bees require a clear flight path where they can fly in and out without human interference.
Security
Consider a location where your buzzing friends are protected from intruders, predators, and robbers.
Accessibility
You should choose a place that is convenient for you. A place where you can drive or access easily by foot even in bad weather or late hours.
Wind Protection
You will need to protect the bees from strong winds. Too much wind makes it hard for them to regulate the temperature of their hive.
Sun and Partial Shade
The beehive should face the South, East, or Southeast to expose the bees to the early morning sun. The early sun warms them up to prepare for the day’s work. On the other hand, the hive should not be exposed to the sun the whole day. When the hive gets too hot, the bees spend too much time regulating the hive’s temperature. Consider a partial shade to shield them from high temperatures.
Food Resources
Consider a place where the bees can find abundant nectar and pollen sources within a 3 miles radius.
A Level Ground
Ensure that where you place your hive is level ground. An irregular base will result in uneven combs since bees build combs perpendicularly to the ground.
A Water Source
As the weather warms, the bees not only look for pollen and nectar but also for water. They require an accessible water source not to run to the neighbor’s pool. They use water to cool the hive in the hot season.
How do you position your hive?
- You should position your hive where it will get direct sunlight in the early morning hours.
- Tilt the hive forward slightly to drain the rainwater out of the hive. This position also enhances the condensation that forms in the nest to drop out rather than getting in the brood nest.
- Ensure the front of the hive (approximately 5-10 feet) is clear. It ensures the bees have a clear flight path as they leave to forage and when they return.
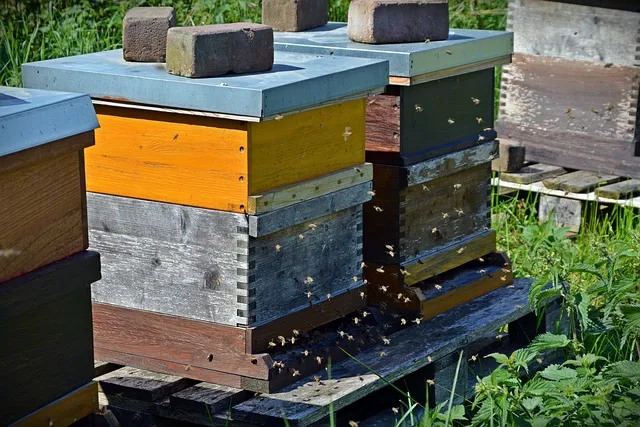
- Place a large rock on the top of the hive to keep it safe from strong winds.
- You can consider erecting a fence if children are going near it.
- Elevate the hive off the ground by placing it on a hive stand to prevent dampness and keep it safe from the predators such as skunks. It also protects the bottom board.
How to choose the Right Bees
Unless you are lucky enough to catch a swarm, you must purchase your bees to start a colony. After establishing the first colony, you can split your hive to keep the colonies growing. It is advisable to check your state beekeeping association to get reputable suppliers in your vicinity. This will ensure you get the right bee stock and those that are adapted to your climatic region.
Bees are not native to the USA and were introduced from Europe, Africa, and the Middle East. The three major races include Italians, Caucasians, and Carniolans. Most beekeepers prefer Italian bees due to their high honey production and gentle temperament. They also have prolific brood cycles and are less prone to swarming. They are readily available in nucs and packages. However, they tend to drift easily to other hives and are more vulnerable to pests and diseases.
How to Obtain Your Desired Bee Stock
Buying Package Bees
Bee packages are popular in the USA. Many new beekeepers succeed in this venture by using bee packages. A package comprises a queen in a cage, thousands of workers, a handful of drones, and a perforated tin filled with sugar syrup. They are ordered in pounds; 1 pound contains about 3500 bees. Most beekeepers start with 3 pounds. A package contains 2-5 pounds.
Buying a Nuc Hive
This is another fantastic way to get a bee colony. It contains a queen bee, several thousands of worker bees, a few drones, and a few frames of brood and honey. In short, a nuc is an already functional colony. It gives you a rapid start in colony establishment since the bees have already drawn comb. Again, brood shortens the time a colony takes to get new bees since the various stages of bee growth are represented. The frames of honey provide food for the bees as their work gets established. They are available from bee breeders and are presented as deep Langstroth frames in a wooden box.
A complete Hive
A complete hive is an established colony with a queen, enough bees, and sufficient comb for survival. They are the most costly and only available locally. They are an excellent choice if you can afford them. You should ensure that they are free from pests and diseases and well established before you buy.
A Swarm
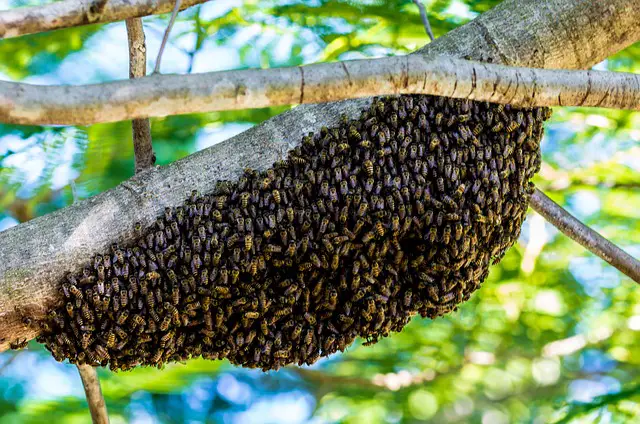
Honey bees naturally divide and multiply their colonies through swarming. This scenario happens when there is overcrowding in the hive, mostly in late spring. The old queen leaves the nest with about half of the colony to a new home. While scout bees look for a new location, the swarm clusters on posts, bushes, house walls, etc. You can capture the swarm and put it into your new hive at this stage.
More articles you may like to read –
What month should I buy bees?
What is the best bee for beginners?
Can you keep just one bee hive?
Do I have to buy a queen bee to start a beehive?
How to Install a Bee Package into Your Hive
- Remove the inner and outer cover of the hive.
- Remove four or five frames from one end of the hive body (brood chamber).
- Before opening the bee package, spray the bees with a sugar solution so that they don’t fly around. They will start feeding on the syrup and will be a bit calm. Full-bellied bees are usually calm.
- Pry open the box(bee package) with a hive tool, remove the cover and the feeder, and take out the queen cage. Replace your lid so that the bees do not escape.
- Check whether the queen is okay and insert the cage between two center frames. You can rubber bud the cage onto the frames to place it securely.
- Now back to your package. Dislodge the bees by shaking the package vigorously. Then, remove the cover and shake the bees into the hive. You may consider removing more frames to create more space. Don’t worry about the bees that get astray; they will find their way to the hive. Some bees will remain in the package box. Place the package in the hive so that they can move into the nest before dusk.
- Put the sugar syrup at the entrance.
- Carefully and gently insert the frames back into the hive body not to smash the bees.
- You can now place the inner and outer cover and let the magic begin.
The following day, the bees will start making short flights outside their new home to orient themselves to the surroundings. After 3-4 days, check to see if the bees have released the queen from her cage; if not, remove the cork and release her directly to the colony. The bees access the queen by eating the candy that seals one end of the queen’s cage.
How to Maintain and Support Your Bee Colony
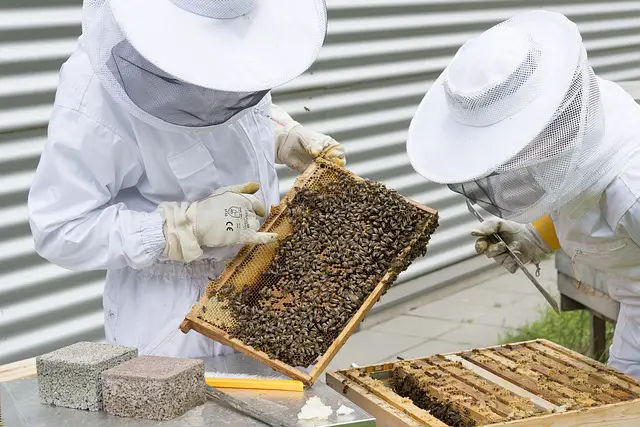
Routine Inspections
Carry out routine inspections to ensure the colony is healthy.
Disease, Pest, and Parasites Control
Ensure timely control if your colony is infested with pests or diseases.
Supplement Feeding
From late winter to early spring, your colony will require a boost of food before the flowers start to blossom.
Temperature Control
Honey bees maintain a hive temperature of 35 degrees centigrade. In summer, they cool the hive when it becomes too hot, while in winter, they cluster together to keep warm. You can make their work easier by providing a partial shade that will shield them in the hot hours of the day. Again, ensure there is a water source nearby. During winter, you cover the hive with an insulating material to help them preserve the heat in the nest.
Know the Perfect time for Inspections
You should carry out inspections when foragers are away to minimize stress on the colony. Again consider a time with favorable weather and take minimal time on the hive( about 15 minutes)
Repair or Replace Damaged Hive Parts
Beehives wear out with time. Insects or large animals can also damage them. Ensure you repair the damaged parts as soon as possible or replace them with new ones.
Provide Maximum Security
Ensure adequate security is in place to keep off predators, thieves, and unauthorized persons.
Which are the Common Honey Bee Pests
Varroa Mites
Varroa mite is an external bee pest that feeds on brood and adult bees and reproduces on the pupa. They are the number one killer of honey bee colonies in the USA. A beekeeper should regularly check the varroa mites and carry out the treatment measures if they are high.
Small Hive Beetle
The small hive beetle is a major honey bee pest in most regions. They feed on the brood, honey, and pollen. The larva stage of the beetle is the most destructive in the hive. You can prevent their infestation of your colonies by observing hygienic measures and raising a healthy colony.
Wax Moth
They attack combs in weak colonies. You can detect their infestations on the hive by the presence of webbings on frames or supers and galleries through combs.
Common Bee Diseases
American Foulbrood
It is a bacterial disease that attacks the brood( larvae and pupa). AFB is highly contagious and has no cure. The bacteria from high resistant spores are easily spread by contaminated equipment and adult bees.
ChalkBrood
Chalkbrood is a fungal disease that affects larvae. It mainly affects less populated and weak hives. It is common in damp conditions of early spring.
Nosema
Nosema is a protozoan disease that causes digestive issues in adult honey bees and is common in wet and cold areas. A damp environment is a good breeding ground for the disease.
How to Protect Your Colony from Pests and Disease
- Maintain a large and healthy bee population
- Prevent robbing to reduce the spread of diseases and pests among colonies
- Carry out regular checks on your colony for signs of pests and diseases
- Avoid feeding your colony with honey or other foods from unknown sources
- Purchase bees from reputable sources
- Learn to identify the various pests and diseases and signs of infection
- Requeen your colony regularly to maintain a healthy colony
How to Know when Your Colony is Planning to Swarm
Swarming is a natural honey bee of propagation to form a new colony from an existing colony in response to overcrowding in the hive. It usually happens in late spring and early summer. In preparation for swarming, the workers raise a new queen by building several queen cells where the queen lays fertilized eggs. The larvae are fed exclusively with royal jelly. Before the queens emerge, the original queen leaves the hive with about half of the colony. The first queen to emerge in the old hive kills all the other queens. If two of them emerge simultaneously, they fight until a single one remains. Here is how to tell your bee colony is preparing to swarm
Presence of Queen Cells
Queen cells on the bottom bars is a good sign that your colony is preparing to swarm.
Increased Number of Drones
In preparation for swarming, the queen lays more unfertilized eggs to increase the number of drones in the hive. This ensures that both colonies will have enough drones.
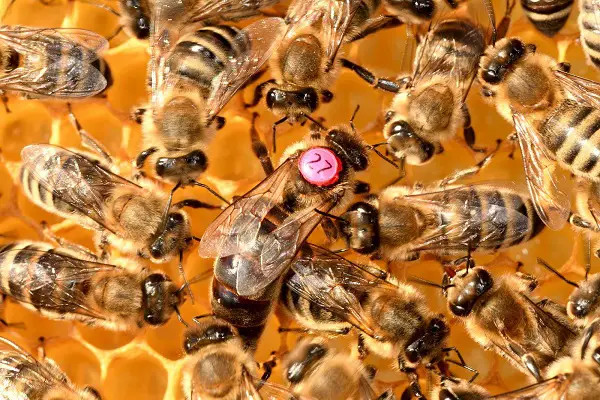
Reduced Queen Size
Towards the final days, before swarming, the queen must lose some weight to be able to fly. The workers stop feeding her. They also chase her around so that she can be agitated to stop laying eggs.
Bees Clinging Outside the Hive Box
This is usually the last step to swarming, and it is too late to stop the bees.
How to Stop Swarming
- Provide more space for the bees when necessary
- Split the hive in spring
- Remove the queen cells
- Carry out routine inspections on your colony to know what is happening