Bee Hive Inspection Guide. How and when to do inspections?
Carrying out inspections in your bee colony is the only way to know what is actually happening in the hive. It is one of the key ways to ensure you maintain a healthy colony. The inspection process can be intimidating, especially for novice beekeepers. Even experienced ones, at times, can get overwhelmed with all that is happening in the honey bee industry.
Inspections can vary a little depending on the type of hive. For a Langstroth or Warre hive, you will require to unstack the boxes first and ensure you keep in mind their order. For a top bar hive, you just need to take the cover off and start checking the frames immediately.
Similar Articles you may like to read –
Best Essential oils for Hives
How do you keep moisture out of a beehive in the winter?
Why should l use wax on my wooden beehives?
What should I put under my bee hives?
When should you not inspect a beehive?
How often should you inspect your colony?
The timeline is not cast in stone, although it should be done regularly. Every beekeeper or a bee farm has guidelines on how often they inspect their hive. It is advisable to minimize inspections as much as possible since every time a colony is disturbed; it sets it back by a day. As a rule of thumb, a new hive should be inspected every 7-10 days in spring and summer.
Once the colony is established, the inspection time can be lengthened. You can check the outside of the hive for notable signs between official inspections. On a warm sunny day for a healthy hive, worker bees leave the hive to forage and come back with loads of pollen on their hind legs. Bees’ unusual aggression may be a sign of a missing queen, inadequate food resources, or mites infestation.
When is the best time to inspect a colony?
The ideal time to inspect a hive is on a warm, sunny day. It is best carried in the middle of the day when bees are out foraging to minimize disruption. At midday, the sun will also be high in the sky, which makes it easier to see the hive and brood well. It provides the maximum amount of natural light. Choose a day that is not windy or raining.
What You are Supposed to Check in an Inspection
If you are familiar with the daily workings of the hive, it will be easy to spot anything unusual and potential dangers early and quickly. Noting a problem early enough can make all the difference in saving your bee colonies. Here are general things that you would check in most inspections.
The Queen
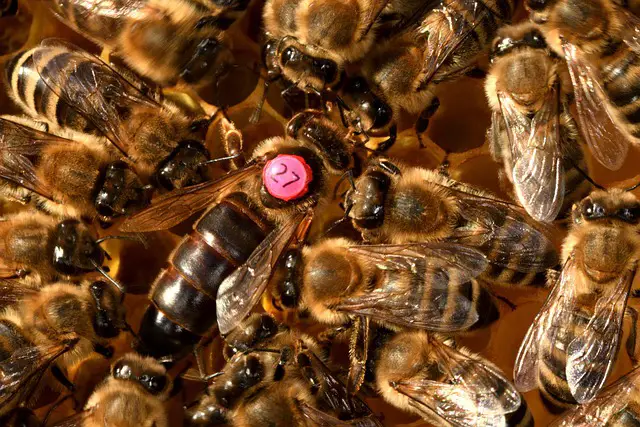
A healthy colony comprises about 60,000 bees wandering around the frames; hence it may be hard to locate her, especially if she is unmarked. If unmarked, you can look for her long, slender, and a circle of workers around her. Read more here on how you can spot her in the hive. You may not see the queen every time you carry out an inspection. Thankfully, some activities in the hive show she is present and healthy, such as the presence of eggs. Eggs indicate that the queen was present in the colony in the last three days. The orientation of the eggs shows how recently they were laid.
Eggs
Identifying the eggs is an essential part of colony inspection. They look like thin grains of rice. The absence of eggs signifies the absence of a queen bee. There should be one egg per cell at the center. More than one egg in a cell indicates there are laying workers. When the queen pheromones cease, some workers’ ovaries start to develop, and they begin to lay unfertilized eggs. The eggs result in drones since they are unfertilized. The best way to see them is by holding the frame tilted up towards the sky at around a 30 degrees angle when the sun is shining brightly in the sky. If you are unable to see, magnifying glasses can also be instrumental.
The Brood Pattern
The brood pattern informs you of the quality and viability of the queen. A health queen usually fills the center of the brood frame with brood while the workers fill the edges with honey and bee bread. A spotty pattern throughout the frames shows an unproductive queen, and you may require requeening.
The Brood
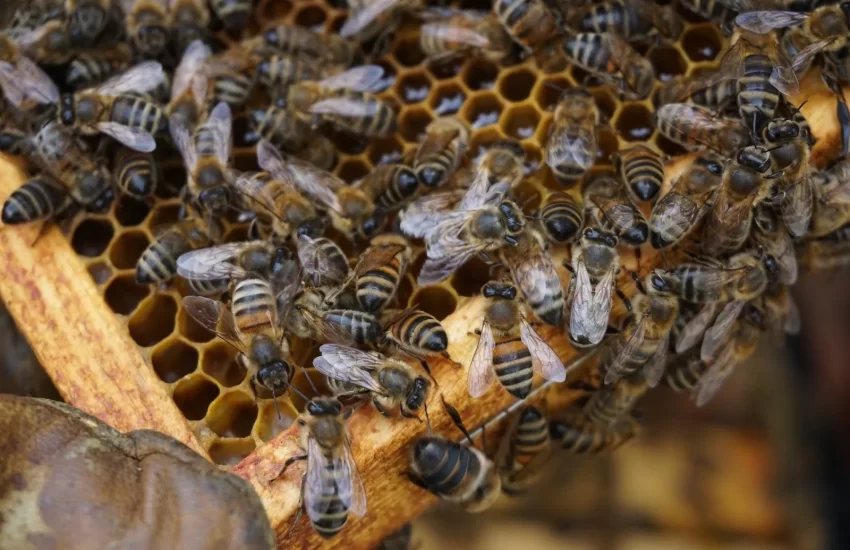
Check the capped and uncapped brood on the frames. Worker bees have a lifespan of about six weeks. Capped brood in the hive represents the immediate next generation of workers and drones. There should be a steady supply of workers to replace the workers that are constantly dying out. Uncapped brood signifies the natural progression of brood in the colony. The absence of brood(capped and uncapped) gives a stern warning to the colony.
Signs of Swarming
You know your colony is planning to swarm by the presence of swarm cells along the bottom of the frame. A colony prepares the cells when they intend to swarm.
Signs of Pest and Disease Infestation
The most critical pests and diseases you should know about include varroa mites, tracheal mites, and small hive beetles. Diseases include American foulbrood, nosema, European foulbrood, and chalkbrood.
Bees Temperament
When carrying out an inspection, it is essential to monitor the bees and their behavior. Unusual behavior may indicate a present or an upcoming problem.
Bees Population
You should check on the bee population and whether it is growing. The Bee population indicates the strength of the hive. When a colony is at full strength, you can see bees on top of other bees or even moving clusters of bees.
Odor
Usually, a hive has a very pleasant odor. If you detect an awful smell from your hive, something unusual is happening in the hive. It can be a sign of American foulbrood or pests like small hive beetles.
Honey Stores
As you carry out your inspection, you want to be aware of the food stores that are available for your colony, especially towards the cold winter season. You also need to check the pollen stores as they are vital in feeding the brood.
An earlier inspection may determine your inspection. For instance, if you detect an issue and have already taken action, you will want to check the outcome.
Precautions to Take When Carrying Out Inspection
Stay Out of the Bees Flight Path
It is advisable to avoid the bees’ flight path(entrance side) where they enter or leave the hive. Blocking their way may make them agitated and trigger the guard bees to attack. You should approach the hive and work from behind.
Stay Calm
Carry out your inspections in a slow, thoughtful, and precise way.
If the bees become agitated by your presence, it is advisable to walk away slowly. You may return another day when they are calmer.
Suit Up
Wear your protective gear to protect yourself from bee stings.
How to Prepare for Inspection
Before you embark on an inspection, you should ensure that you have all the necessary equipment. You don’t want to look for a hive tool when the bees are all over you. You should also wear protective clothing to protect yourself from bee stings.
Tools Needed for Inspection
A beekeeper will require proper tools and equipment to conduct an inspection successfully. The equipment varies depending on your intention of inspection.
Hive tool
A hive tool will help you to pry frames out of supers for hive bodies since bees glue everything in the hive with propolis.
Smoker
A Smoker produces smoke that helps to calm smoke by masking the alarm pheromones the bees produce when they are defensive. Although some skilled beekeepers prefer not to use smokers, this is a handy tool since the colony’s behavior changes from day to day.
Smoker Fuel
Anytime you are using a smoker, you should have dry smoker fuel at hand. You should ensure it is enough to keep the smoker going for hours. The fuel shouldn’t have any contaminants that might be toxic to the bees.
A Notebook and a Pen
A notebook is essential to keep a record of the status of the hive during an inspection. You can record information on pests and diseases, feeding schedules, colony productivity, etc.
A queen cage
This is an optional device to place the queen when necessary.
Protective Clothing
While new beekeepers prefer to wear a full bee suit, some skilled ones work without. However, wearing at least a veil is advisable since bee stings on the face, especially the eyes, can be problematic. A sting on the eyeball can result in blindness.
How to Carry Out Inspection on a Bee Colony( Step by Step)
A standard beehive contains several stacked boxes. The top most box is known as honey super. This is where the bees store surplus honey, which is also the beekeeper’s harvest. The lower box is referred to as the brood box or deep super. This is where the colony raises the brood and also stores the food resources for the young ones. In between the brood boxes and honey supers, there is a screen referred to as the queen excluder that restricts the queen in the brood chamber. It is an optional device. While carrying out the inspection, you should remove the boxes one by one until you reach the bottom layer. Here is the procedure
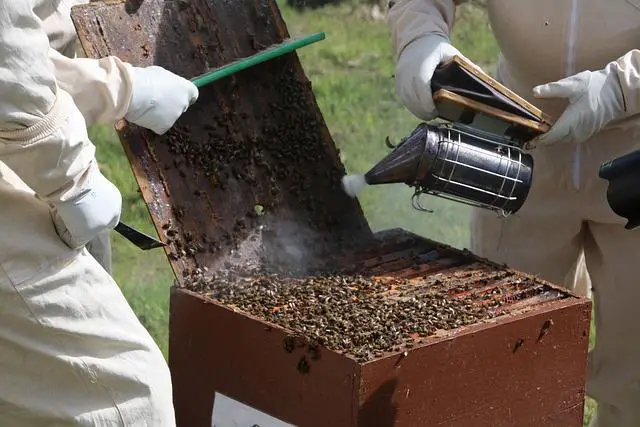
Smoke the Beehive
Before you open the hive, puff some smoke at the main entrance of the hive to calm the bees. Then lift the cover slightly, directly release a few puffs of smoke underneath, and return it gently.
Open the Hive
Remove the outer cover and place it on the ground upside down. Puff some smoke into the hole on the inner cover and wait a few minutes for the smoke to produce an effect. Bees usually respond to smoke by feeding on honey. When their stomachs are full, they become docile, and you can inspect the hive without their interference.
Remove the Inner Cover
Use the hive tool to pry the inner cover and remove it. Place it on top of the outer cover.
Remove the Top Boxe(s)
You should remove the honey supers first. Use the hive tool to pry and separate each box before removing it. Remove the queen excluder if you have one.
Remove the Deep Boxe(s)
Next, puff smoke on the deep box, remove the brood box or boxes, and place them on top of the honey super. Remove the second deep gently.
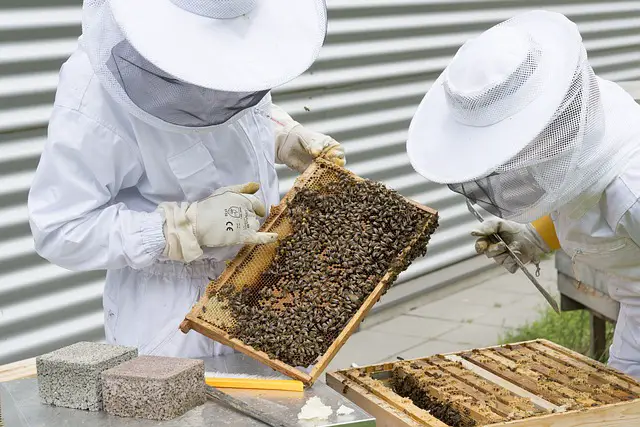
Inspect the Brood Frames
Start your inspection with the first deep box. Direct some smoke between the frames and remove the first frame taking care not to injure the bees. Inspect the contents and return to the same slot to maintain order. Ensure not to change their order during an inspection and space them evenly when you are through. It is also essential to check the drawn-out (filled) comb. When 7-10 frames are drawn in the deep box, it is time to add another deep box. If you have a second deep box, go on with the brood inspection and place it back on the bottom box. Use a bee brush to move the bees out of your way.
What to Look for
- The queen
- Brood and brood pattern
- Eggs
- Signs of diseases and parasites
Inspect the Honey Frames
Once you complete the brood frames, move on to inspect the honey supers. Look at the frames full of capped honey( covered with white waxy coating). If 7-8 frames are full of capped honey, it is to add another super.
Restack the Boxes
Place back the honey supers on top of the brood box carefully and gently to avoid disturbing the bees. You can use the bee brush to remove the bees from the surfaces. Remember to replace the queen excluder if you have one before placing the honey supers.
Replace the Inner Cover
Place the inner and outer cover back into their position gently and carefully so as not to smash the bees.
Remember to put away your smoker where it can burn out safely.
Record Your Findings
Notes are essential in tracking changes in your colony. It is good to do this right away, so you don’t forget the information. Here is crucial information to note down include
- Whether you found the queen or not
- Status of the brood
- Signs of pest and disease infestation
- Anything uncommon in the hive
How to Carry Out Inspection Without Opening the Hive
While routine colony inspections are essential, you can sometimes inspect the hive from the outside. These observations are also important.
Watching the Bees
Watch the bees from the sides to avoid blocking their flight path. In a healthy colony, you will notice plenty of foragers returning to the nest with pollen loads on their hind legs. The pollen sacs resemble puffballs and can either be yellow, orange, or red.
Robbing
Robbing is likely to occur when natural food supplies are scarce. You realize there is robbing when you discover a frantic activity at the hive entrance. A colony defends itself by pushing intruders away. You may also see bees or wasps flying around the sides of the hive, trying to get access.
Dead bees
Dead bees are removed from the hive by house bees. Many dead bees may signal a significant problem in the nest that may require a more thorough inspection.
Overheating in the hive
There may be overheating in the hive if you realize the bees are bearding outside the hive.
When Not to Perform Inspections
During a nectar dearth
When there is a shortage of food resources, the bees protect their hive zealously. At this time, opening the hive also opens the hive for bees from other colonies to rob.
In winter
During the cold season, inspections should cease apart from checking whether there is enough food.
Extreme weather
Avoid opening the hive when there is extreme heat, rain, or extreme cold unless it is essential.
More articles you may like to read –
What colors should you avoid around bees?
What Color Bees Cannot Recognize?
Why are bee suits white? How reliable are bee suits?
Varroa Mite Treatment for Honey bees
FAQs
How do l hold beehive frames while carrying out inspection?
It is vital to correctly hold and inspect the individual frames to gather the correct information. Ensure to stand back to the sun with the light shining onto the frame. The sunlight illuminates the cells and helps you to see the eggs and tiny larvae better.
How do l know whether the brood is healthy?
Brood is the portion in the comb that contains capped larvae, eggs, and uncapped larvae. A healthy brood indicates that the colony is thriving. A healthy brood includes all stages of the brood with minimal empty cells. There should be cells representing all stages of development. A low amount of brood shows the queen is not performing well, although mites and poor foraging conditions can affect brood levels.
How long does a hive inspection take?
A regular hive inspection takes 15-20 minutes if no issues arise. However, the inspection time may differ depending on the intent of the assessment. For instance, if you are checking whether the supers have capped honey, it will take only a few minutes. On the other hand, if you are treating varroa mites, it will take more time.